
Guestroom Arrival Mirror
A full-length lighted mirror with a focused side zone for a jacket, room card and small bag. Start from this design, then define what your guestroom needs.
Concept / In Development. Configurations are requests for development review, not confirmed stock options.
One design, different hanging positions
The side zone proposes three fixed coat-peg positions, a tray and a separate lower bag peg. The pictured jacket uses only the highest position; middle and lower heights need real-garment trials. The pegs do not slide, and this is not a three-coat capacity claim.
A thin champagne-finish frame direction and two front vertical light strips keep the clear main mirror central. Finish remains a sample direction.
Continue to this design’s series, then select Customize this design on its card to build your brief.
Customize This Design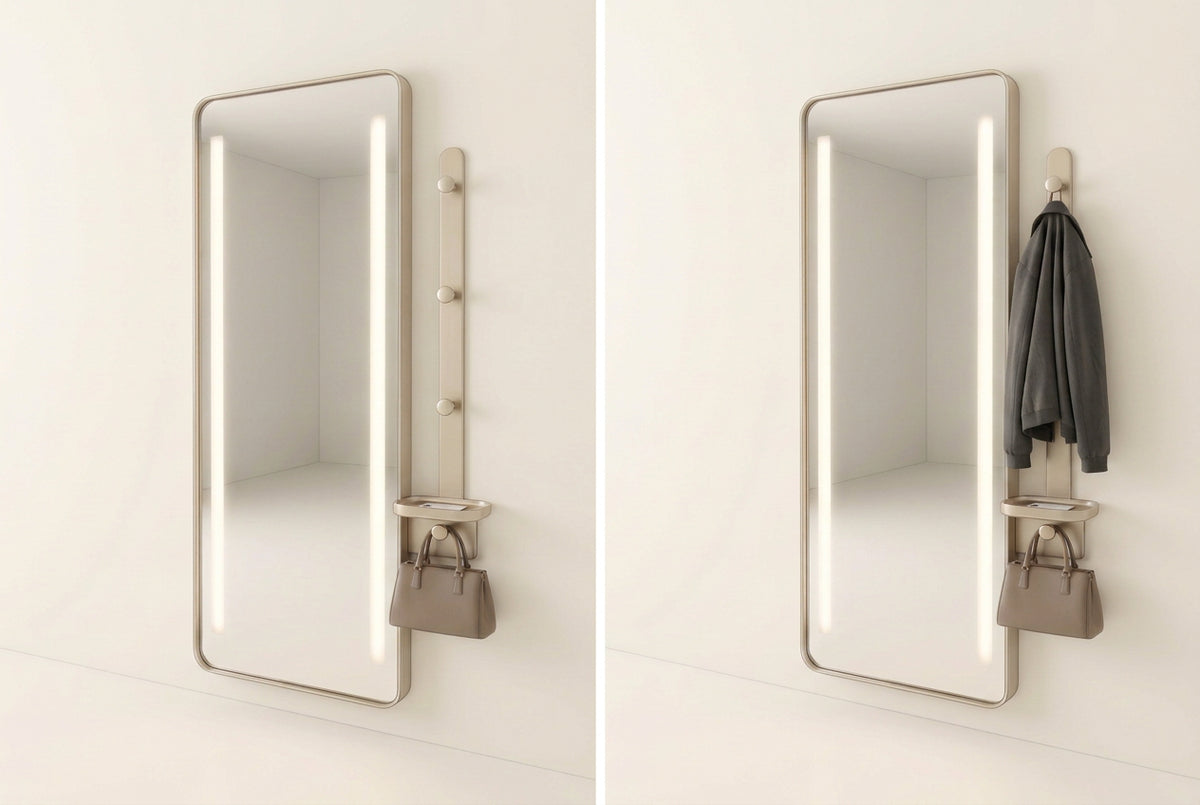
A place to arrive. A moment to head out.
On arrival, set down a room card or phone, hang a jacket and place a small bag before moving to the luggage bench. At departure, check the mirror, take the jacket, bag and card. The desk remains for work; the bench remains for a suitcase.
This is a mirror design study, not a room-furniture package.
How the design developed
Start with a small landing place. The first direction paired a full-length lighted mirror with a shallow side tray. The aim was to give a room card or phone a temporary place without crossing the glass or turning the entrance into a worktop.
Separate what is placed from what is hung. Adding a round-headed peg below the tray gave a small bag its own position. A higher peg then introduced a place for a jacket. A slender connecting spine brought those functions together instead of scattering fittings around the mirror.
Use the spine to offer height choices. One high coat peg left much of the spine unused. We therefore explored several fixed positions for different reach and garment needs. This is not automatically better: a lower position may let a hem cover the tray or bag, so the third point remains a decision to test rather than a feature to preserve at any cost.
What we kept—and what we left open
We kept the full reflection, two vertical light-strip directions and a restrained side zone. We set aside decorative overlapping frames, extra shelves and a sliding adjustment mechanism for this version. Peg spacing, garment clearance, connections and finish still need practical development.
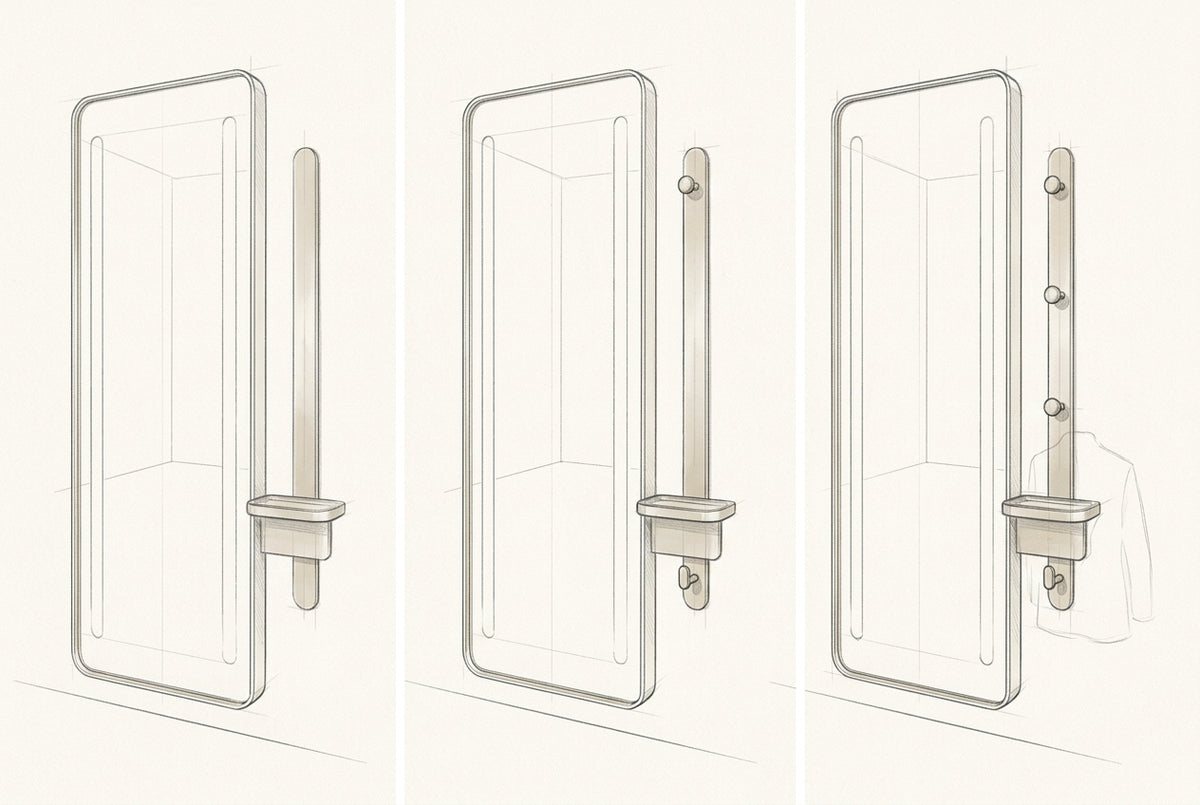
Three studies, one evolving idea
Left: a small-item landing place. Centre: separate coat and bag positions around the tray. Right: several fixed coat-height choices on the same spine, with a faint garment outline raising the question of hem and tray overlap.
These AI-generated sketches retrospectively summarise the concept decisions. The early arrangement is simplified for comparison; these are not original workshop drawings, measured elevations or tested construction details.
The choice is not to keep every added part. If a lower hanging position blocks the tray or bag, reduce the peg count or separate that function.
Our recommended development starting point
Start with the coordinated side zone: a small-item tray, a separate bag peg and alternative fixed coat-hanging positions beside the full-length lighted mirror. This is the primary direction for a project that needs those functions together—not three equally preferred products.
Keep the peg count open until the occupied arrangement is tested. If a lower position lets the garment cover the tray or bag, omit it rather than preserve a three-point pattern. Use mirror-only or mirror-and-tray as simpler branches when the room already has suitable hanging storage.
Changing the scope may change the support and installation design; these are development directions, not confirmed interchangeable modules.
Build Your Design BriefMirror only
Explore the mirror as a standalone brief; use an existing return elsewhere if suitable.
Mirror and tray
Consider a tray for small-item placement, with the coat return located elsewhere.
Recommended: coordinated side zone
The primary development direction where the room needs a tray, bag return and useful fixed coat-height choices. Confirm peg positions with actual belongings.
Preferred side
Choose left or right for the room brief. A left-side layout requires a new layout; the design is not consumer-reversible.
Finish direction
Review coordinated frame, tray and peg samples. Champagne is exploratory, not a confirmed finish.
Set proportions from the room
Set mirror height and width from available wall space, the actual standing viewing position and the usable reflection required by the brief—not by scaling this image to an arbitrary ratio. Keep accessory objects outside the glass. If the side zone needs to be wider, consider a separate coat return.
Choose useful heights—not just more pegs
Test high, middle and low fixed positions with actual coats, garment lengths, hems, tray access and the bag below at full scale. Drop a position if it obstructs another function; do not force three. No load rating is established.
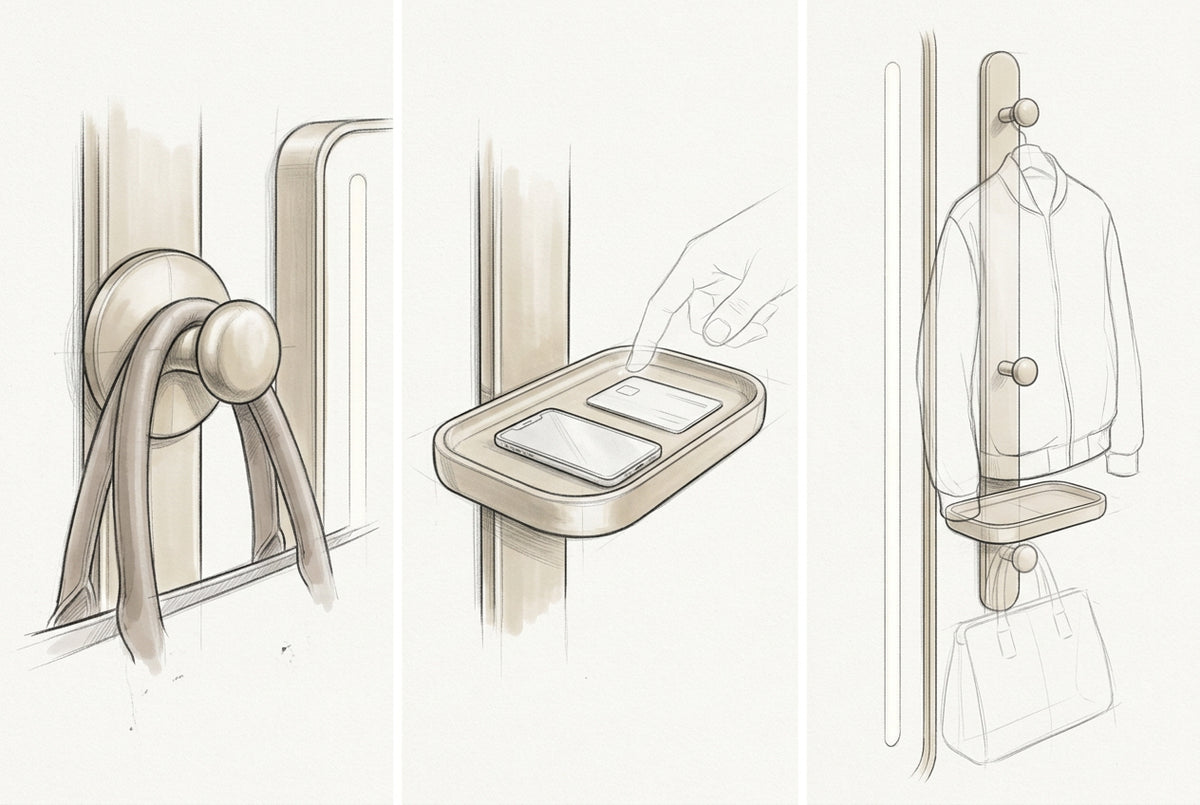
Three details to resolve before a sample
Retain, then release. The left sketch explores how a round head can retain a bag loop while leaving room for removal. Head size, projection, edge treatment and attachment still need development.
Place, then lift. The centre sketch considers a shallow rim and access to a phone or card. Check real object sizes and finger clearance rather than adding tray depth automatically.
Check the occupied zone. The right sketch places a garment beside the tray and bag. It is not a demonstrated lower-peg hanging test. Compare hem and sleeve positions at each proposed height using real garments before keeping every peg.
AI-generated detail studies, not measured drawings or final connections. Forms are simplified for discussion and do not supersede the overall design.
Resolve the support behind the slim appearance
Develop glass retention, spine, pegs, ledge and wall connection together. Whether the support is independent or shared remains undecided; do not assume the thin frame carries bags. Review intended loads, off-centre forces, wall construction, cleaning and component replacement.
Develop lighting and service together
The front strips are a design direction, not proof of lighting performance. Trial components in a practical standing view for glare, switching, power entry, routing and service in the intended environment before sample review.
Build a brief around this design
Share room type, destination country, quantity, room and wall references, functional scope, preferred side, actual coats and bags, lighting and finish preferences, and known requirements. Separate must-haves from appearance preferences. For unknowns, describe the problem to solve rather than guessing a specification.
Develop your version of this mirror
The next page opens the Guestroom Arrival Mirror series. Select Customize this design on the Guestroom Arrival Mirror — Concept Study card to begin your brief.
Generate and edit your brief, copy it, then paste it into the contact-page message and submit it there. The design selector does not send the request for you.
Prefer to discuss the project first? Contact us directly.
Customize This Design